Set Up a Headless Raspberry Pi Hacking Platform Running Kali Linux
The Raspberry Pi is a credit card-sized computer that can crack Wi-Fi, clone key cards, break into laptops, and even clone an existing Wi-Fi network to trick users into connecting to the Pi instead. It can jam Wi-Fi for blocks, track cell phones, listen in on police scanners, broadcast an FM radio signal, and apparently even fly a goddamn missile into a helicopter.
The key to this power is a massive community of developers and builders who contribute thousands of builds for the Kali Linux and Raspberry Pi platforms. For less than a tank of gas, a Raspberry Pi 3 buys you a low-cost, flexible cyberweapon.

Of course, it's important to compartmentalize your hacking and avoid using systems that uniquely identify you, like customized hardware. Not everyone has access to a supercomputer or gaming tower, but fortunately one is not needed to have a solid Kali Linux platform.
With over 10 million units sold, the Raspberry Pi can be purchased in cash by anyone with $35 to spare. This makes it more difficult to determine who is behind an attack launched from a Raspberry Pi, as it could just as likely be a state-sponsored attack flying under the radar or a hyperactive teenager in high school coding class.
Thinking Like an Attacker
The Raspberry Pi has several unique characteristics that make it a powerful and easily accessible tool in a penetration tester's kit. In particular, the Pi is cheap and the components cost as little as a Lego set. Also, the Raspberry Pi is discreet; It's small, thin, and easy to hide. And thanks to running Kali Linux OS natively, it is flexible and able to run a broad range of hacking tools from badge cloners to Wi-Fi cracking scripts. By swapping the SD card and adding or removing components from marketplaces like Adafruit, the Raspberry Pi can be customized to suit any situation.

The Raspberry Pi on Offense
First, it's important to manage your expectations and remain reasonable when selecting a Raspberry Pi as a hacking platform. The Raspberry Pi is not a super computer and doesn't have a tremendous amount of processing power. It's not well-suited to processor intensive tasks like brute-force WPA password cracking, or acting as a network attack as the connection is too slow to fool users. That being said, the Raspberry Pi is perfectly suited to many attack environments. We simply offload these tasks to bigger computers and use the Pi as a data collector.
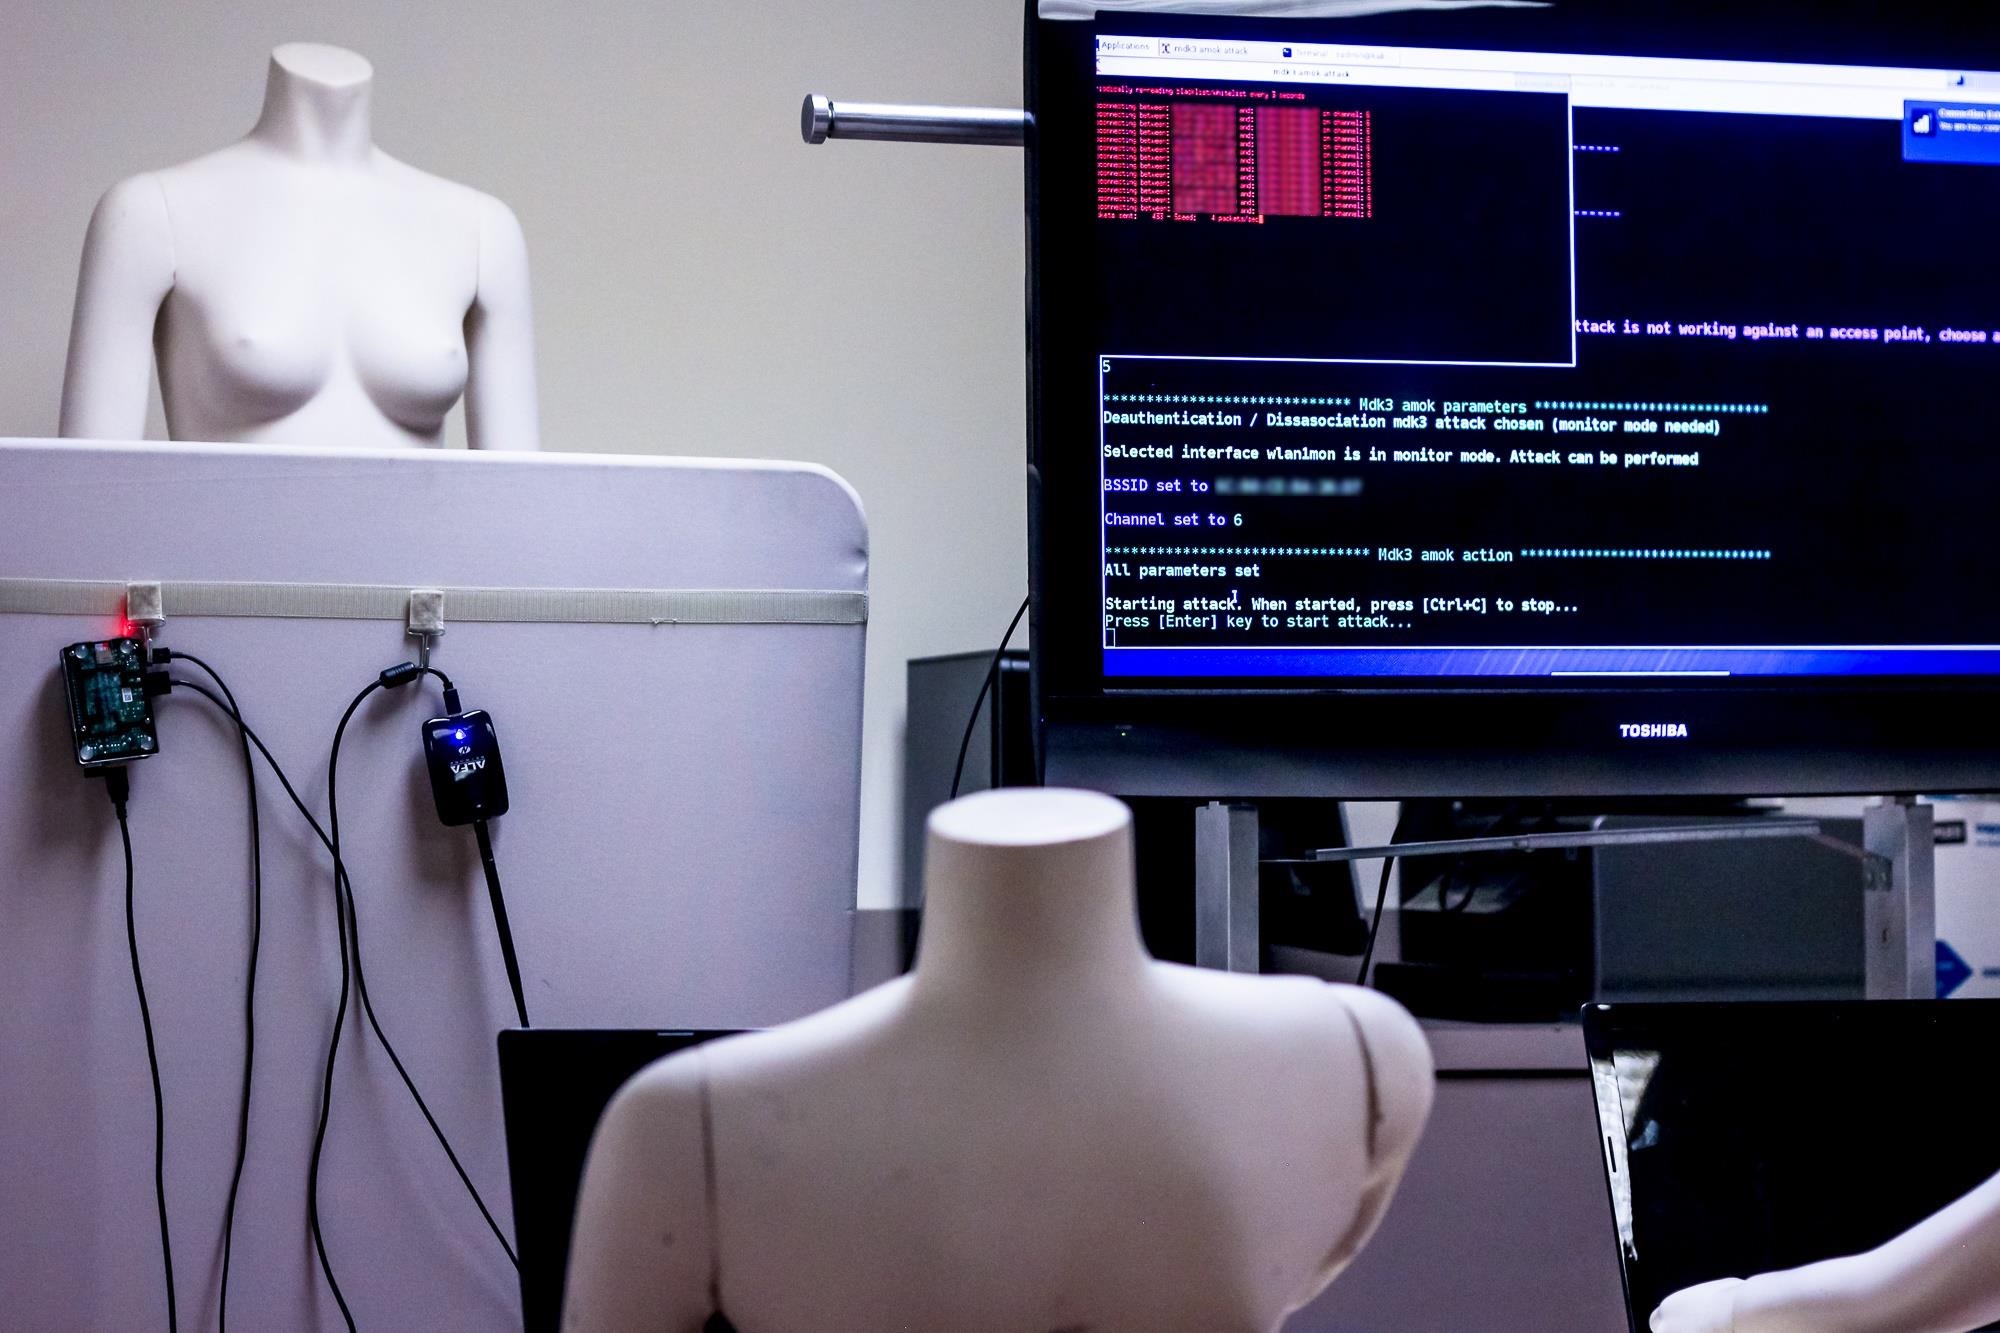
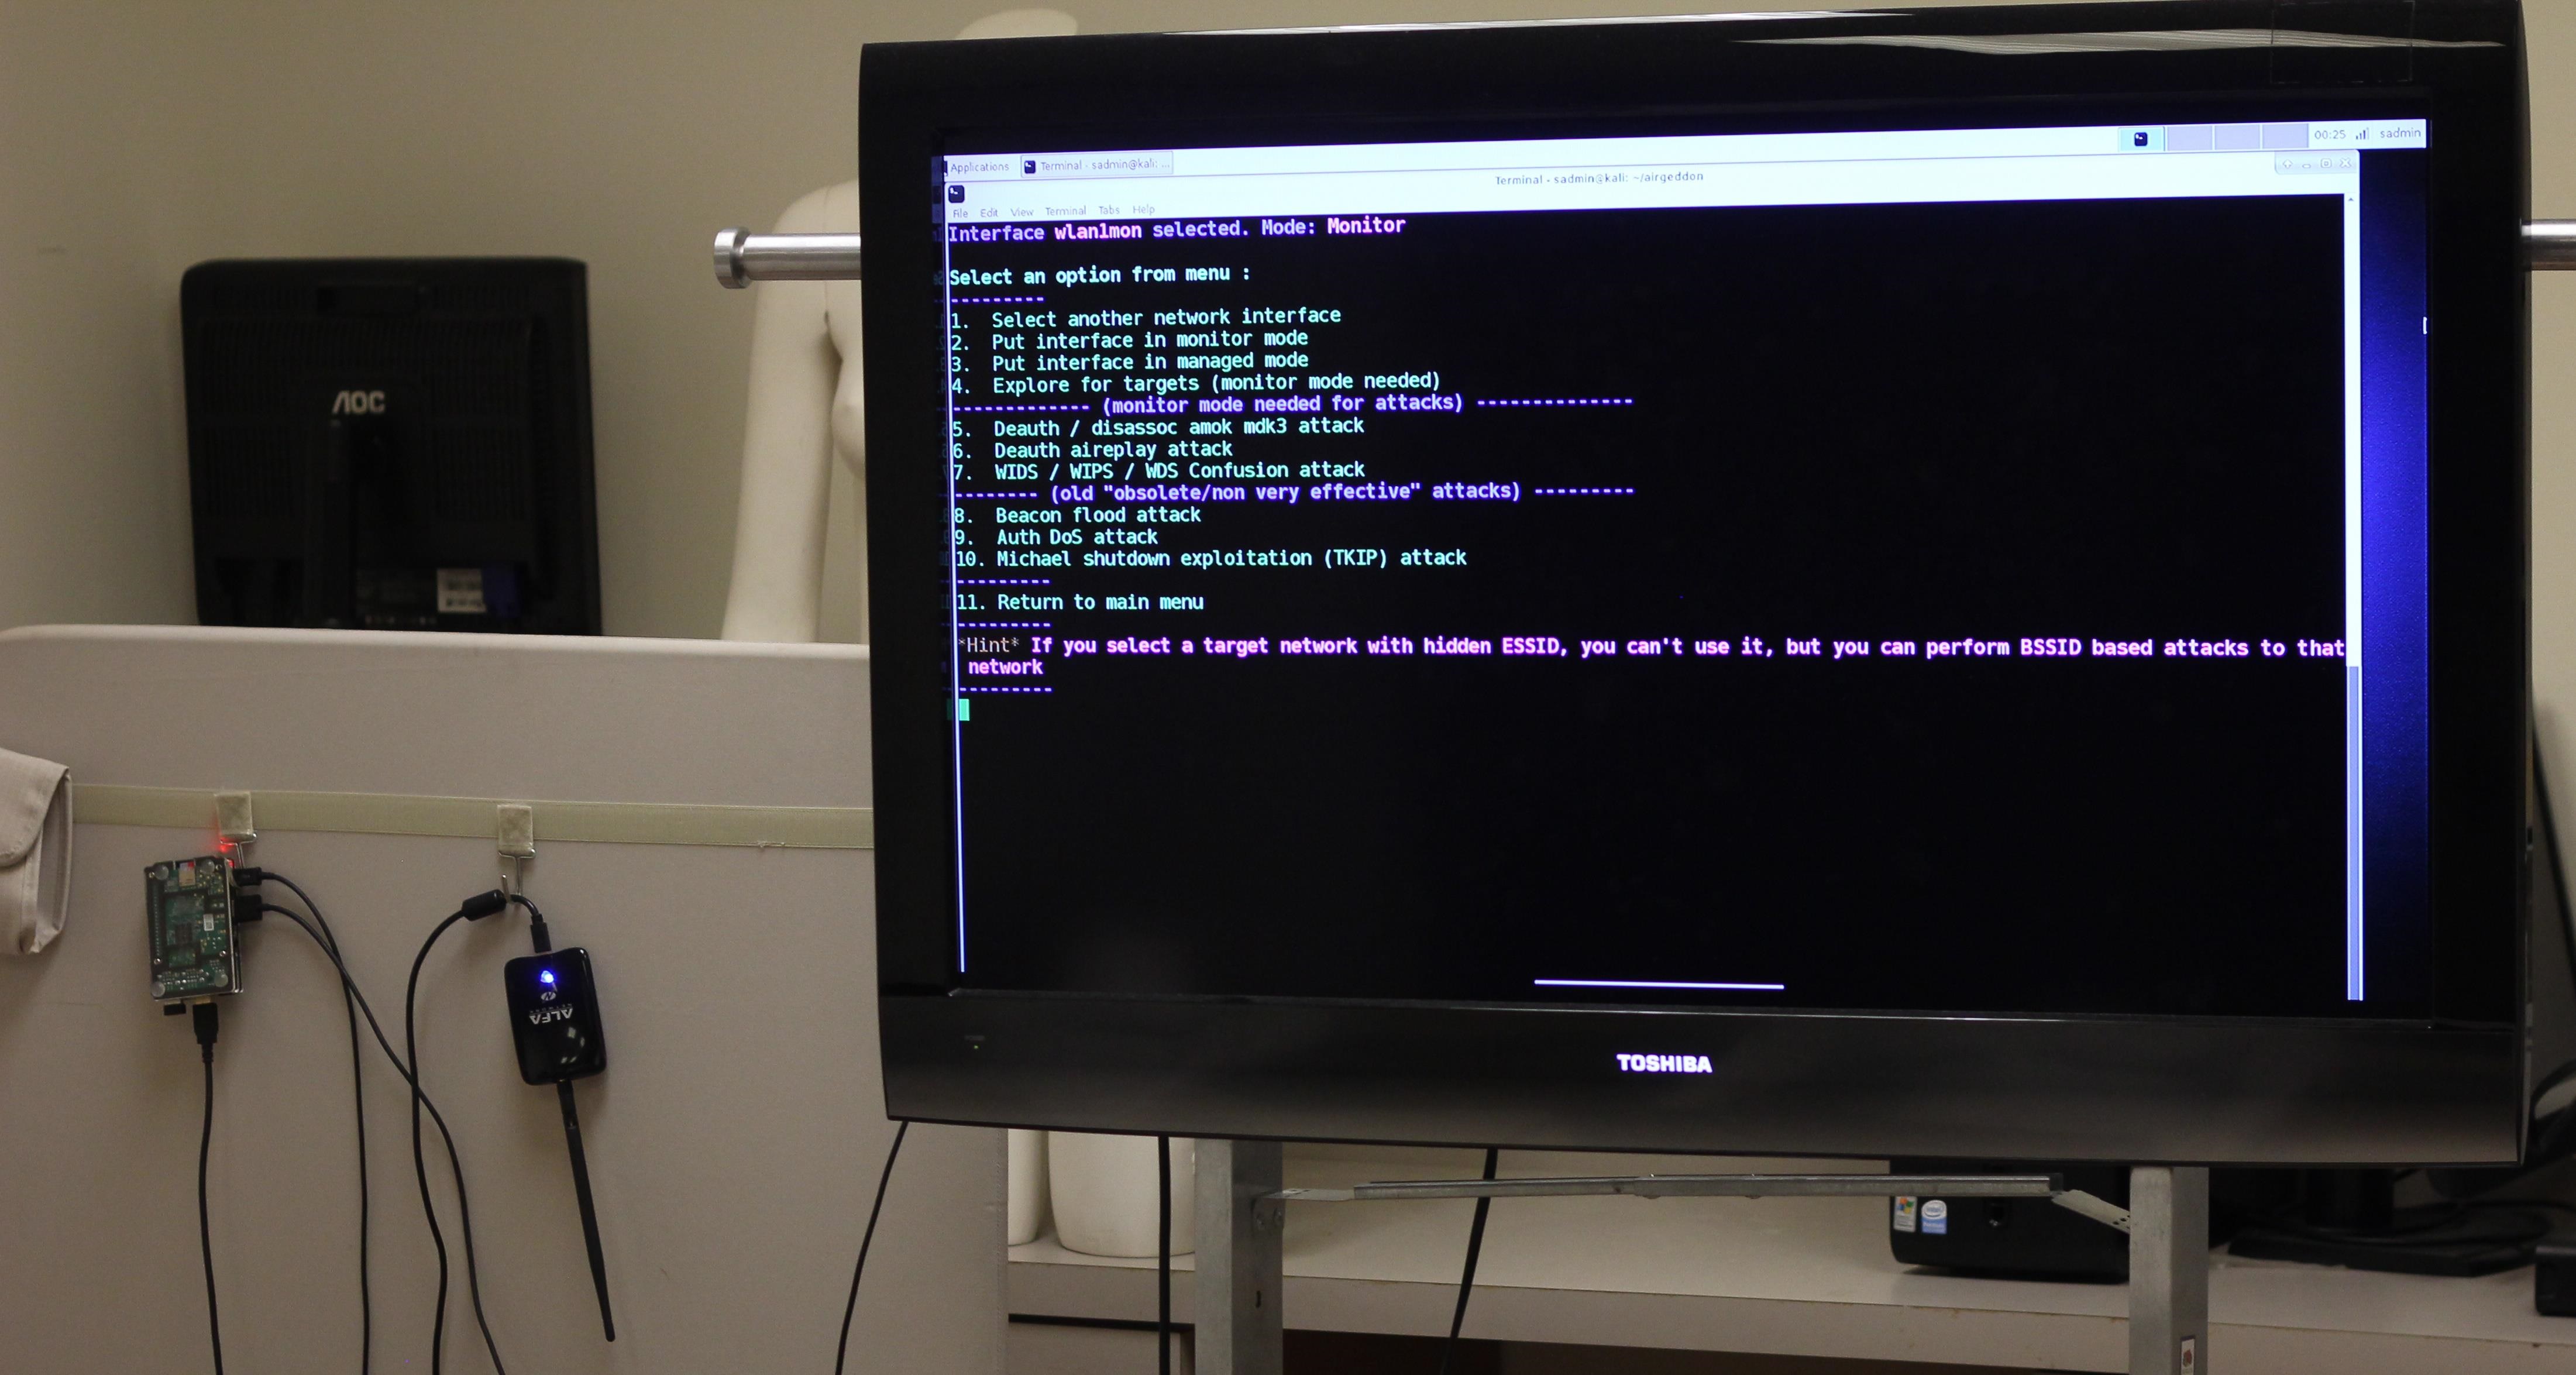
In my experience, the Raspberry Pi works exceptionally well as a Wi-Fi attack platform. Due to its small size and large library of Kali Linux-based attack tools, it's ideal for reconnaissance and attacking Wi-Fi networks. Our offensive Kali Linux build will be geared towards anonymous field auditing of wired and wireless networks.
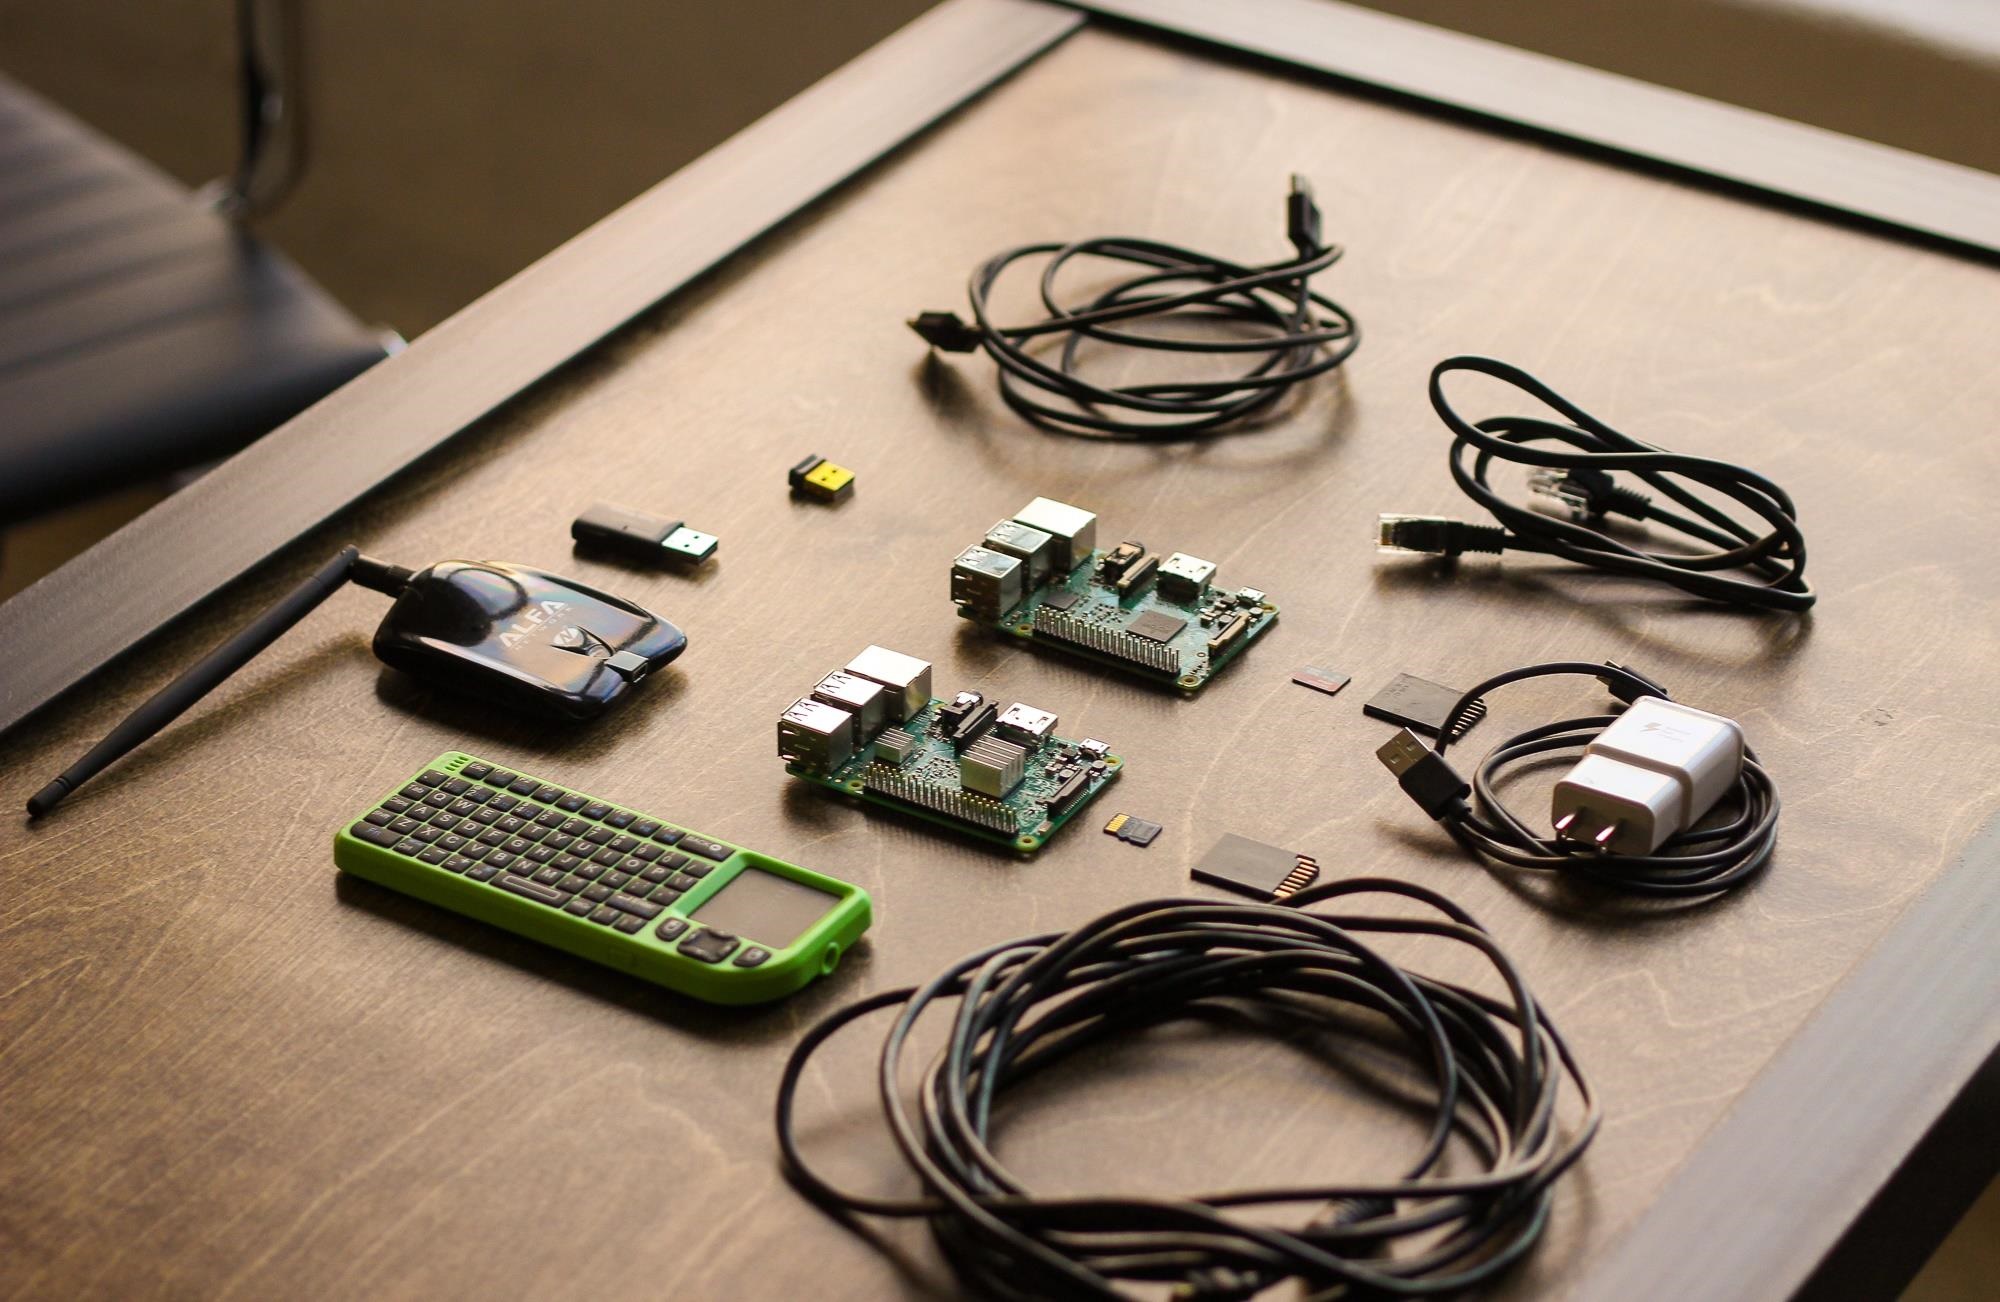
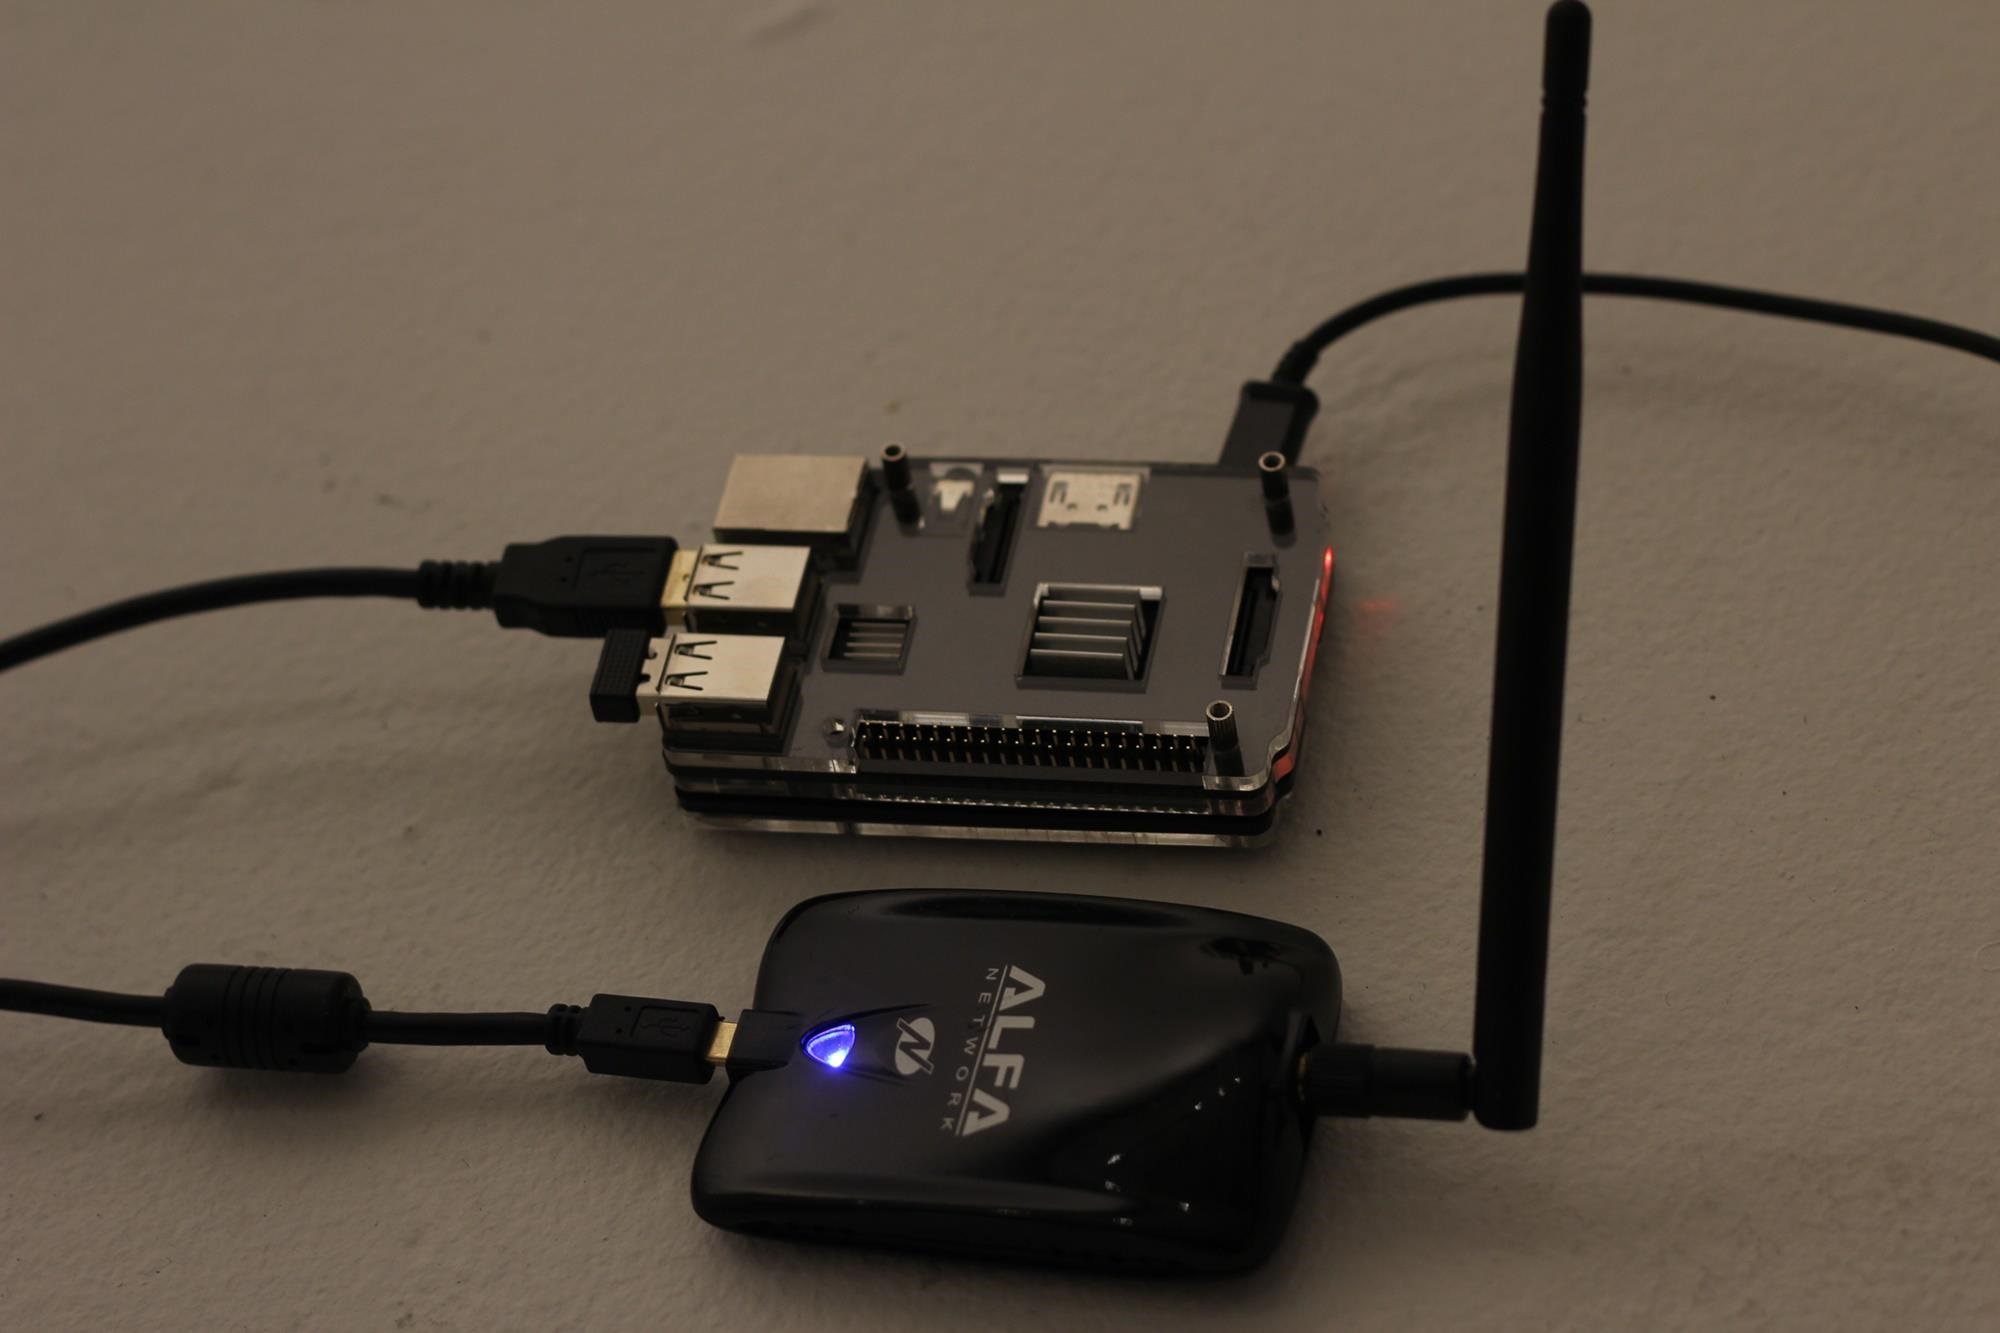
The Basic Components of Our Attack System
Here are the basic components needed to build our Pi attack system, and why we need them. If you're just starting out, this excellent Raspberry Pi Kit from CanaKit includes most of what you need to get your Pi set up.
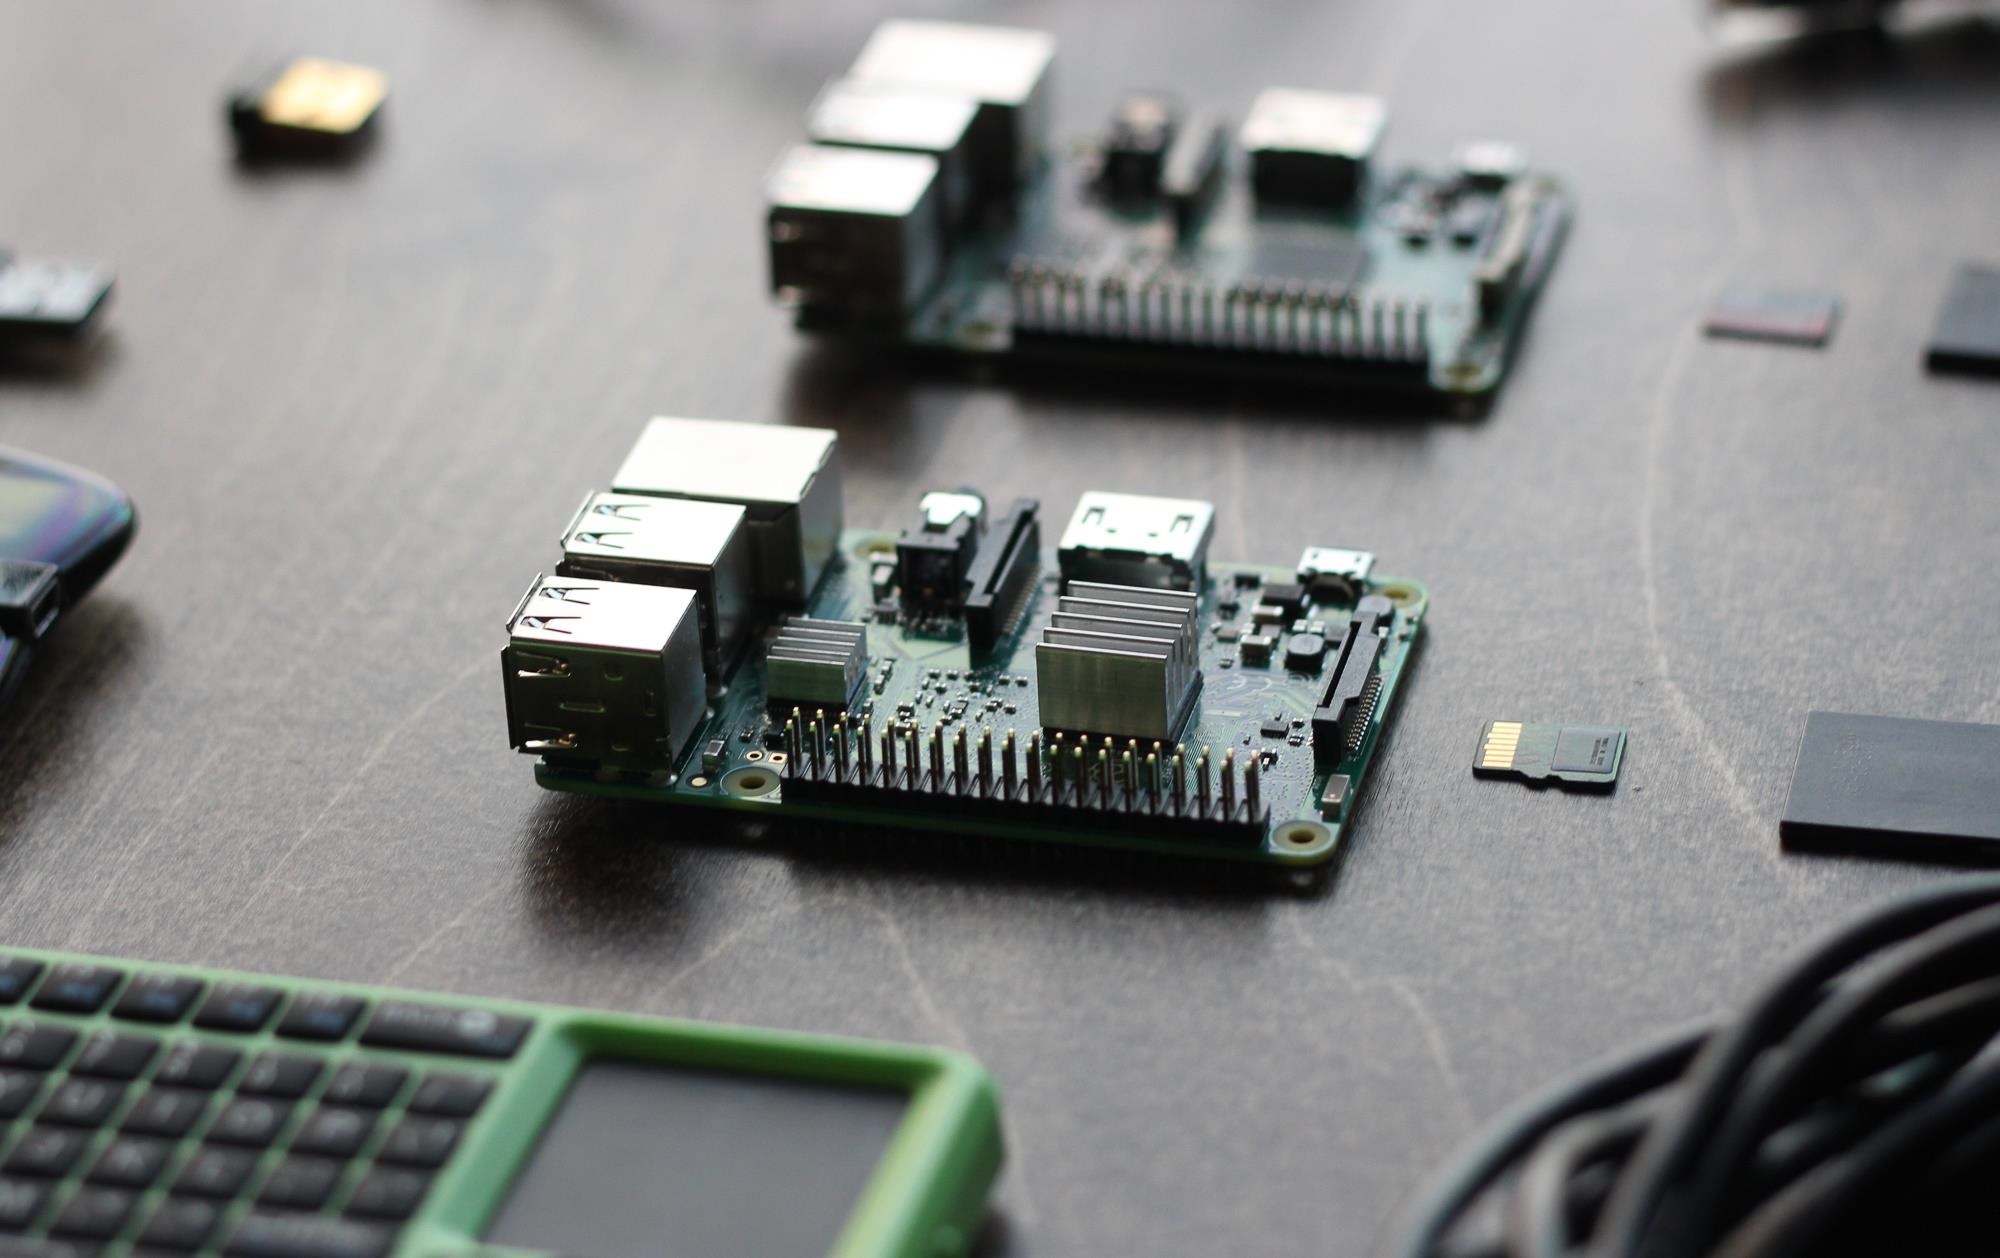
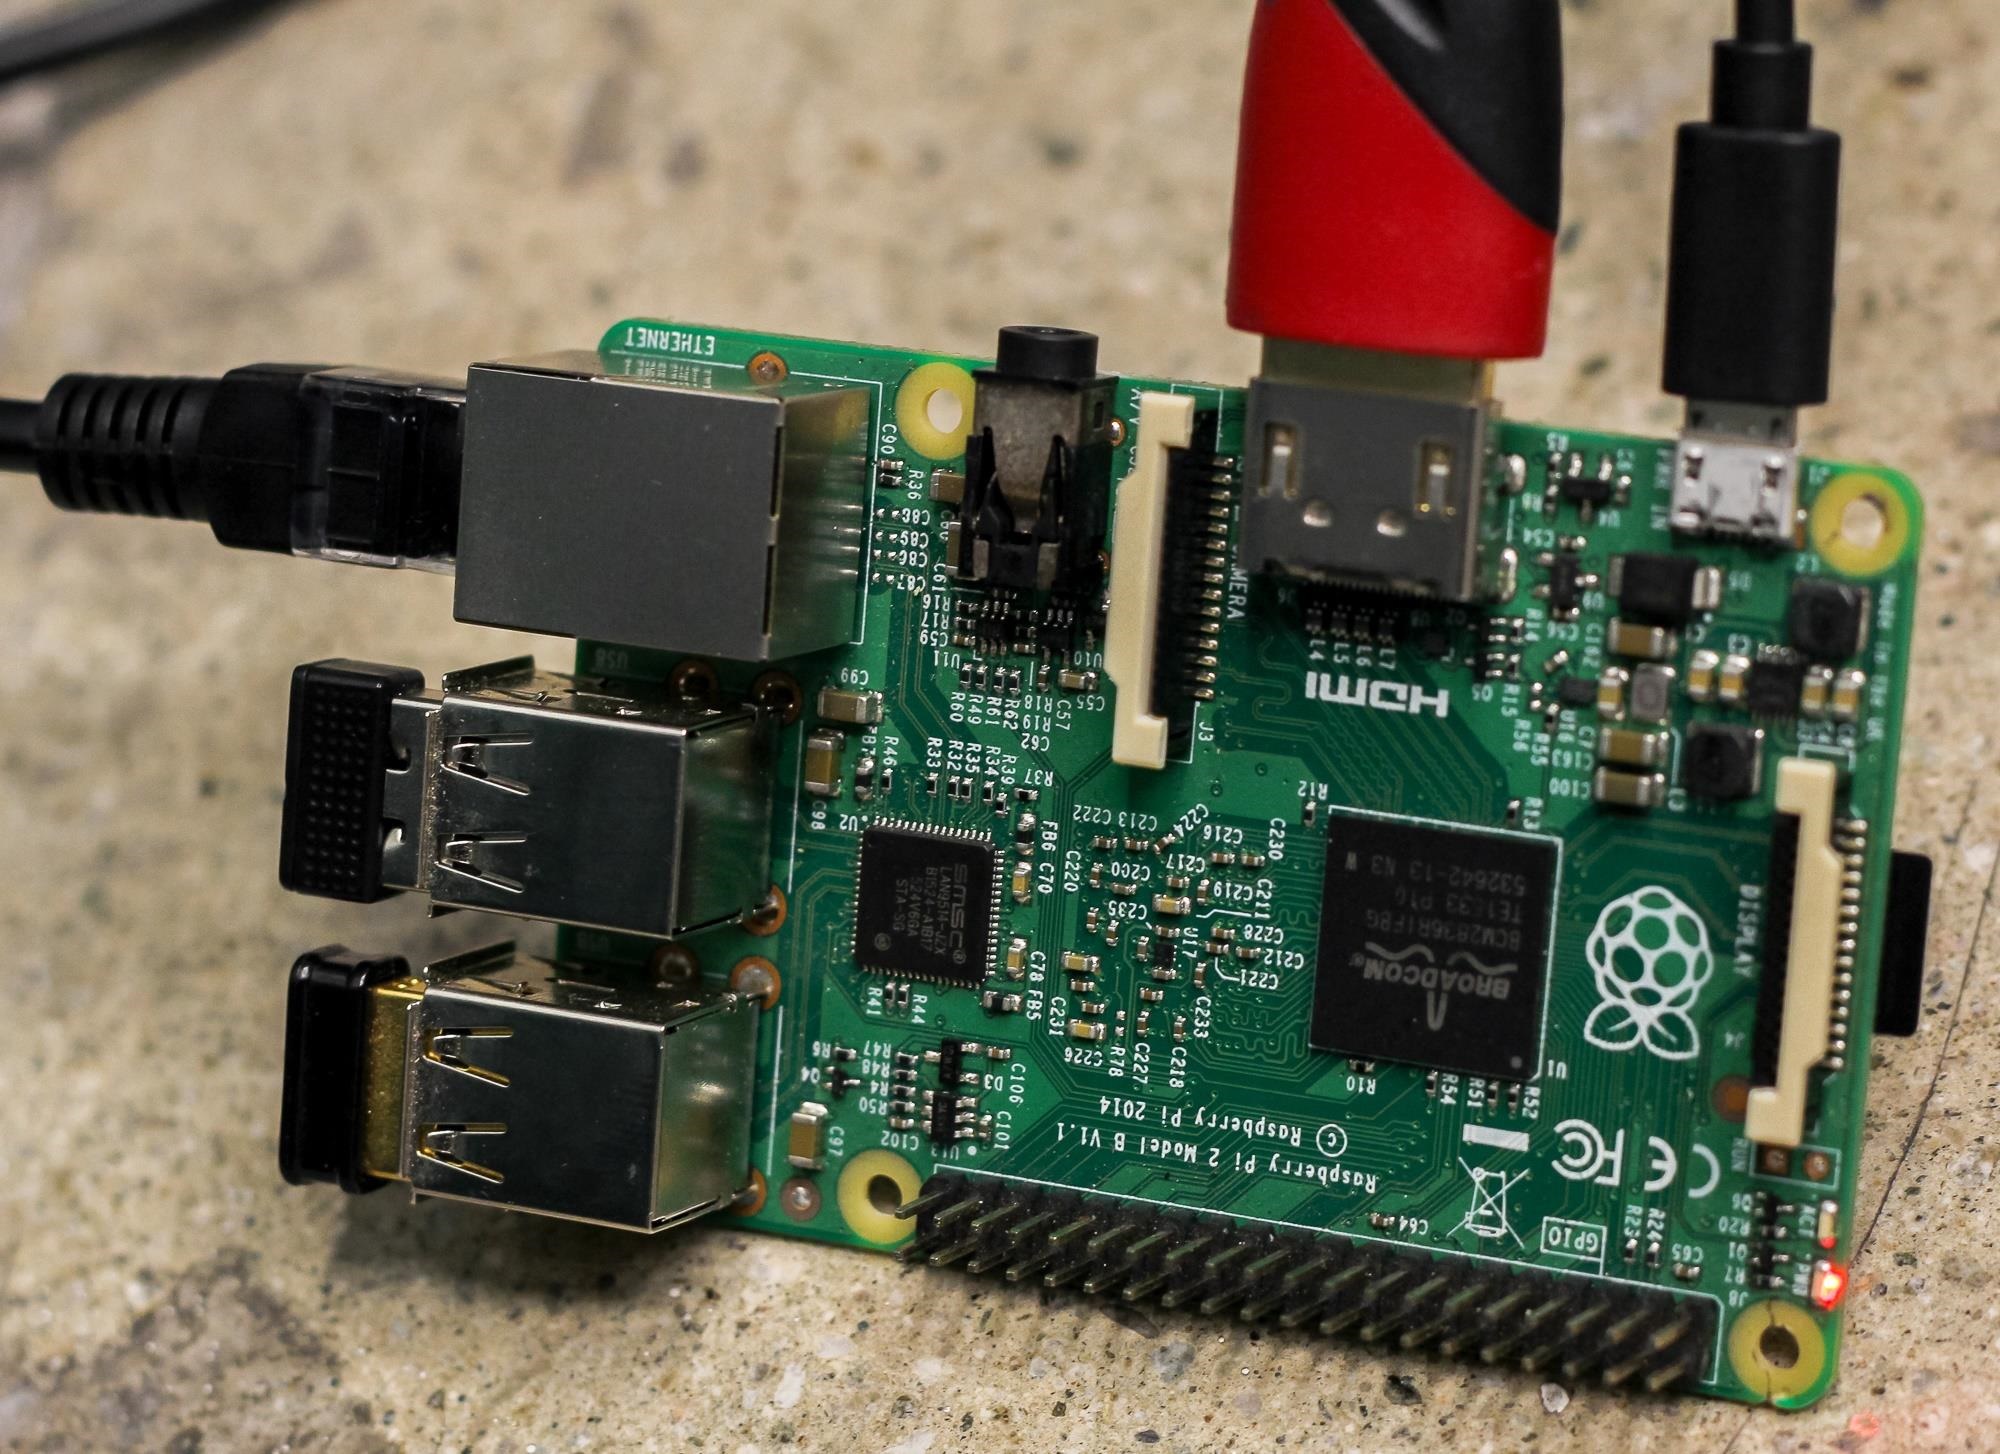
- Raspberry Pi: The Raspberry Pi 3 is the platform of these builds, coordinating and controlling all other components. Its low power consumption and flexible capabilities allow it to serve as a platform for running Linux-based operating systems besides Kali.
- Command and control (C2) wireless card: The purpose of the C2 wireless card is to automatically connect the Pi to the command AP (access point) such as your phone hotspot or home network. This allows remote control of the Pi discreetly or from a great distance via SSH (Secure Shell) or VNC (Virtual Network Computing). Fortunately for us, the Raspberry Pi 3 has a Wi-Fi card internally, but a wireless network adapter can also be added to a Raspberry Pi 2.
- Wireless attack card:: Our attack wireless card will be a Kali Linux-compatible Wi-Fi adapter capable of packet injection. This will be our attack surface and can be a long-range, short-range, or directional antenna depending on attack requirements. You can find a great guide to choosing one here.
- OS build cards: The micro SD card hosts the OS and brain of the computer and can be precisely configured for any desired environment. By creating customized cards, it is possible to rapidly change the configuration and function of a Raspberry Pi by simply swapping the card and components.
- Computer: You will also need a computer to download the firmware to load onto the micro SD card.
- Power supply: The Raspberry Pi uses a standard Micro-USB power supply, and nearly any android phone charger or battery pack will work to power a Pi. This allows for a number of different battery configurations to suit long-endurance reconnaissance or continuiously powered operations.
- Ethernet cable (optional): An Ethernet cable allows you to bypass wireless authentication by directly interfacing with local networks to which you have physical access. Specialized attacks like PoisonTap can also take advantage of ethernet interfaces to infiltrate computers.
- Bluetooth keyboard (optional): A Bluetooth keyboard is helpful for interfacing when you have an HDMI connection.
- Case (optional): Every Pi needs a case to protect it.
Build Considerations
In designing this tutorial, I considered two primary modes in which you would be operating the Raspberry Pi. In our open configuration, the Raspberry Pi is connected to a display via HDMI cord with inputs running through a wireless mouse and keyboard. In our tactical configuration, you will use a laptop or smartphone to access the Raspberry Pi remotely via SSH. By connecting the Pi to our phone's hotspot or a nearby friendly AP, we can access the Raspberry Pi while still being able to use cellular data in the field.
How to Set Everything Up
In this guide, I'll show the steps needed to set up a Raspberry Pi 3 as a basic hacking platform with Kali Linux. I'll go over how to select a build to install, writing the disc image to a micro SD card, and the steps to run after first setting up your Pi. We'll update Kali Linux to the latest version to ensure everything works correctly, change the default SSH keys, and take care of some housekeeping like changing the admin password.

As a note, there are many ways to configure Kali on a Raspberry Pi 3. Some include touchscreens, some are completely headless (accessed via network connections without a keyboard or display), and others use the internal Wi-Fi card to create a hotspot for remote control of the Pi. In selecting this build, I discounted any designs that included a power-hungry and fragile touchscreen or additional hardware, and settled a version optimized for our two different C2 scenarios.
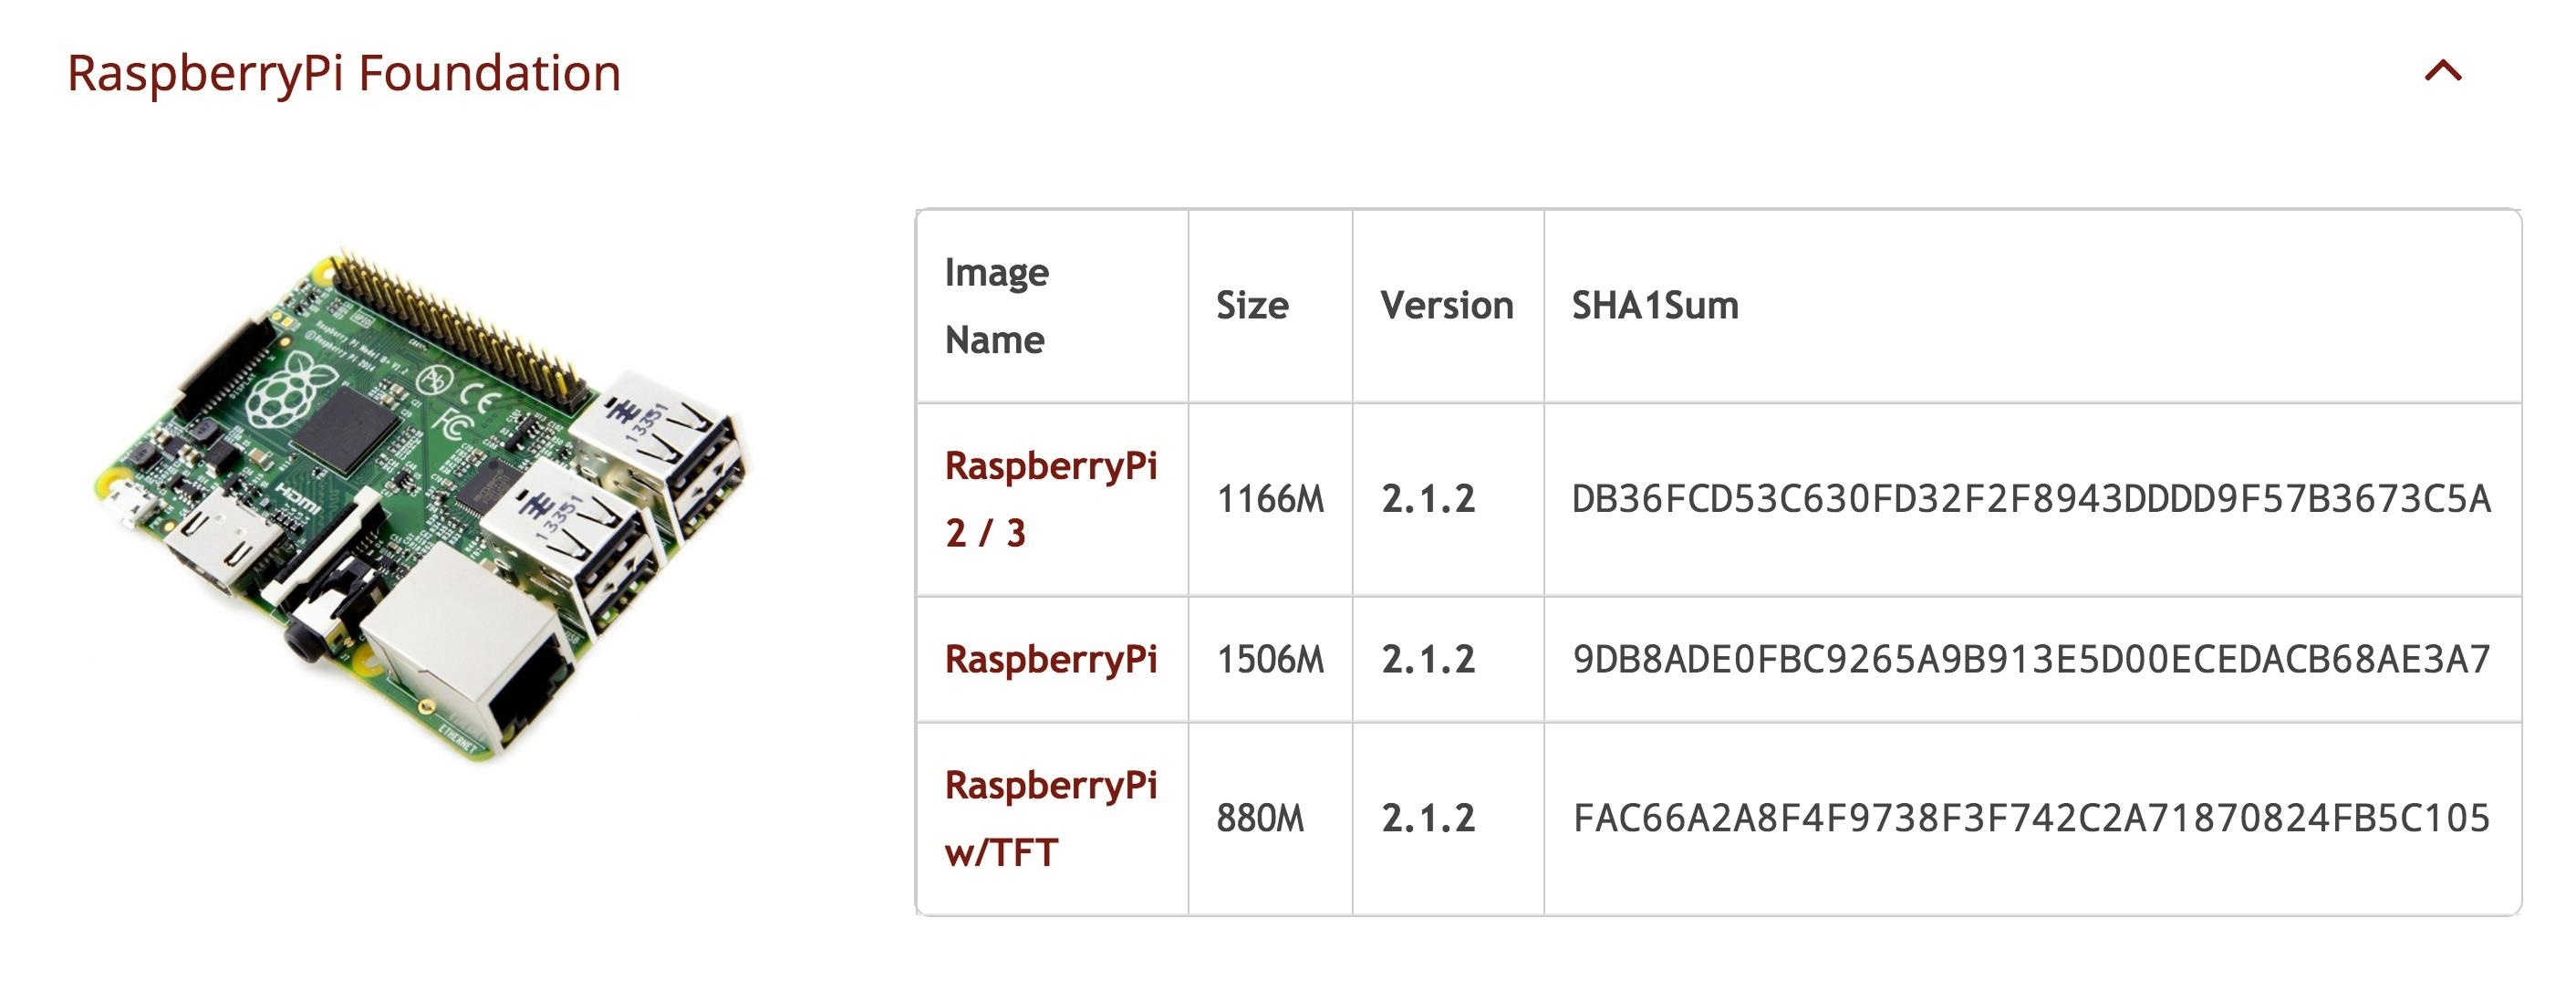
Step 1Download Kali Linux Image for the Raspberry Pi
Head to Offensive Security and download the latest Kali Linux image for the Raspberry Pi. As of this writing, it is "RaspberryPi 2 / 3" on version 2.1.2.
Step 2Flash the Image to the Micro SD Card
You can use a tool like ApplePiBaker for Mac or Etcher to load your Kali image onto your SD card, but sometimes these can result in errors. To prevent that, we'll cover how to do this via Terminal on a Mac. If you use Windows, you can use Win32 Disk Imager to put your image on the card.
On a Mac, before plugging in your SD card, run the following in Terminal:
df -h
This will display a list of all the disks attached to your system. Attach your SD card and run the command again, and note the filesystem name of your SD card (it's the one that wasn't there before). It should look like "/dev/disk2s1" and you should be very careful not to mix this up in the next steps, since doing so could overwrite your hard drive.

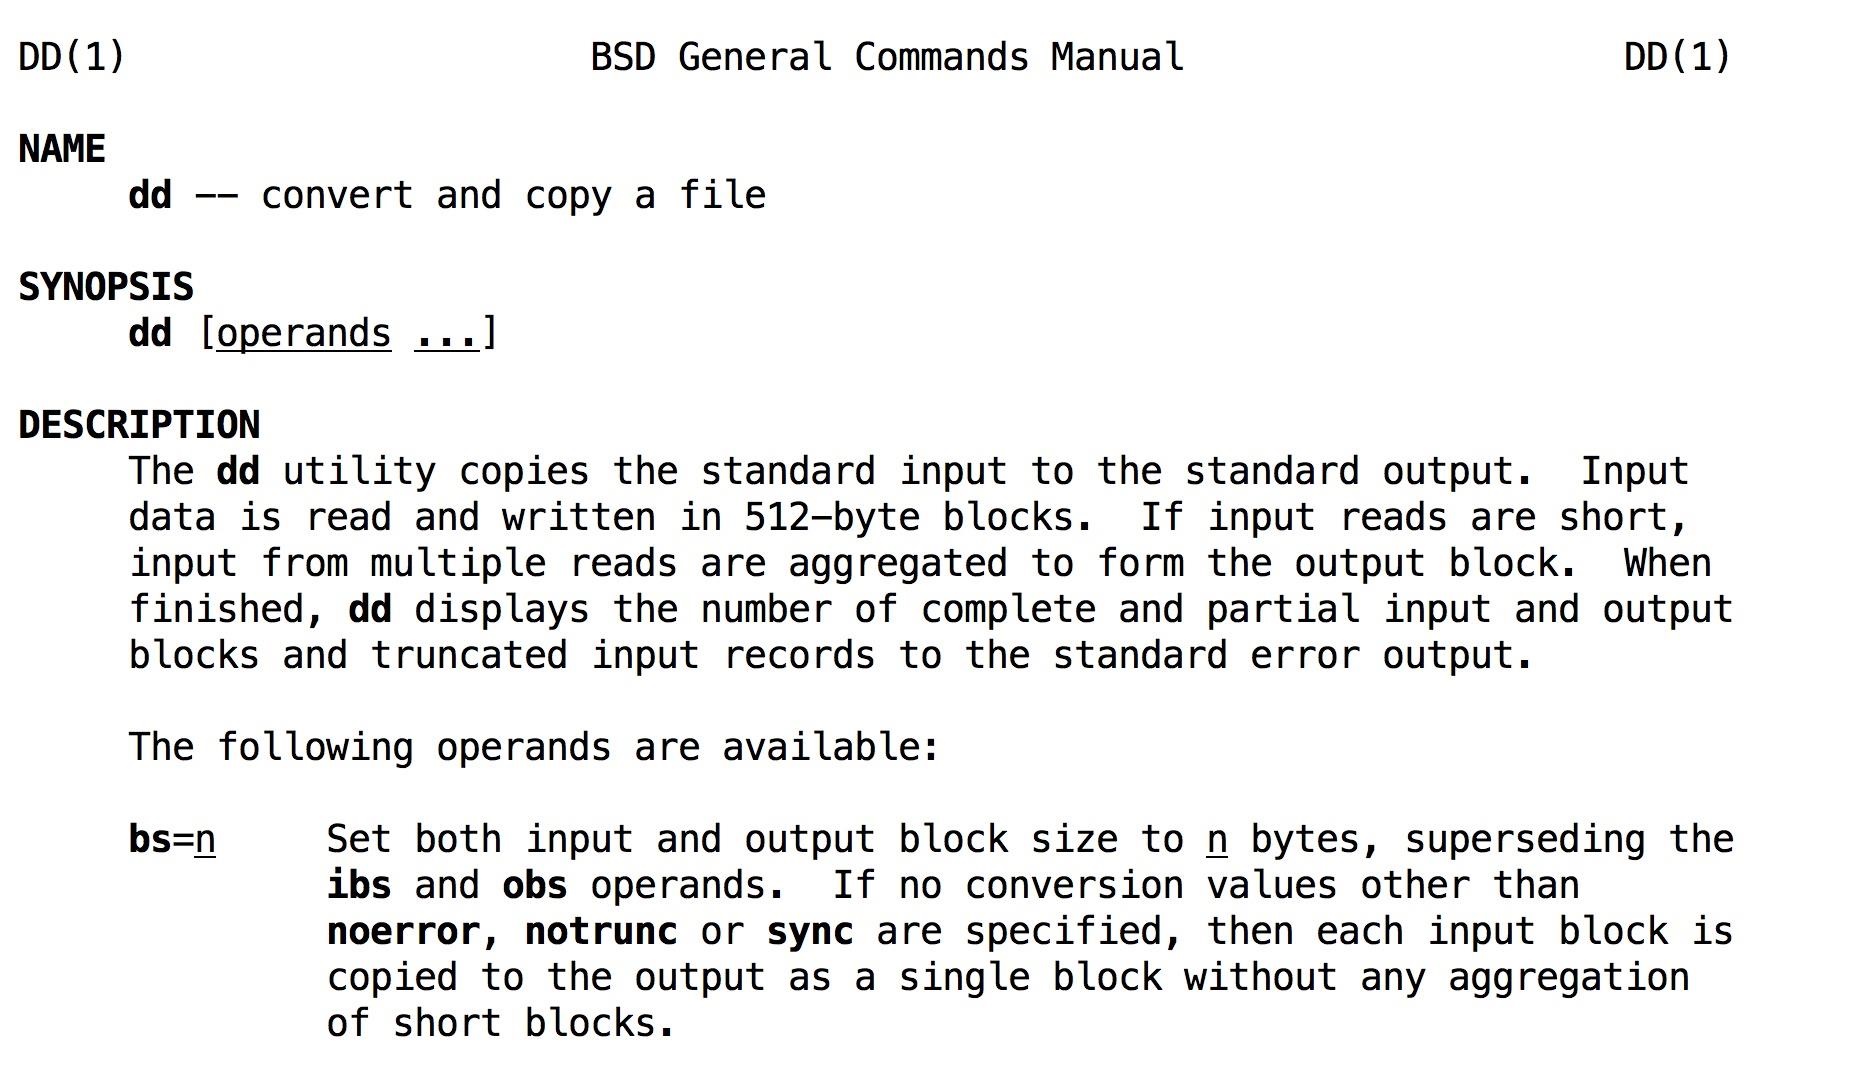
Now, we'll use the dd command to load the Kali image onto the card.
First, let's unmount the partition so you can write to it with the following command, with "x" being the correct disk number:
sudo diskutil unmount /dev/diskX
Now we're ready to load Kali. Type, but don't run the command, sudo dd bs=1m if=and enter the location of the Kali Linux image we want to load onto the card. You can drag and drop the disk image into the window to show the file path. After that, type a space, then of=/dev/rdisk and the number of the disk from before.
If there is an "s" after the initial disk number (like rdisk2s1), do not include the "s" or following number. So, "rdisk2s1" should look like "rdisk2." Here's what it should look like altogether:
sudo dd bs=1m if=LocationOfKaliImage of=/dev/rdiskX
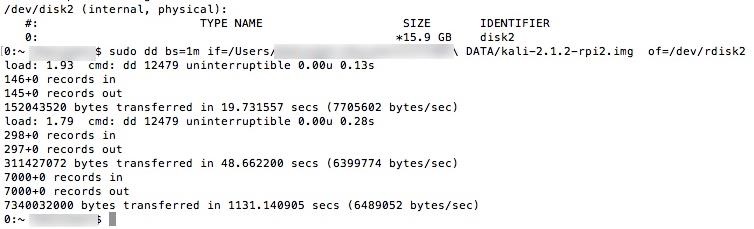
Press enter to begin the process, and note that dd does not provide any on-screen information unless there is an error or it finishes. To view the progress during the transfer, you can type Ctrl T. Wait for the process to complete. You'll know the process is complete when you see a readout of bytes transferred over the time the process ran.
It will look like the screenshot below (if you press Ctrl T a few times during the transfer) when complete.
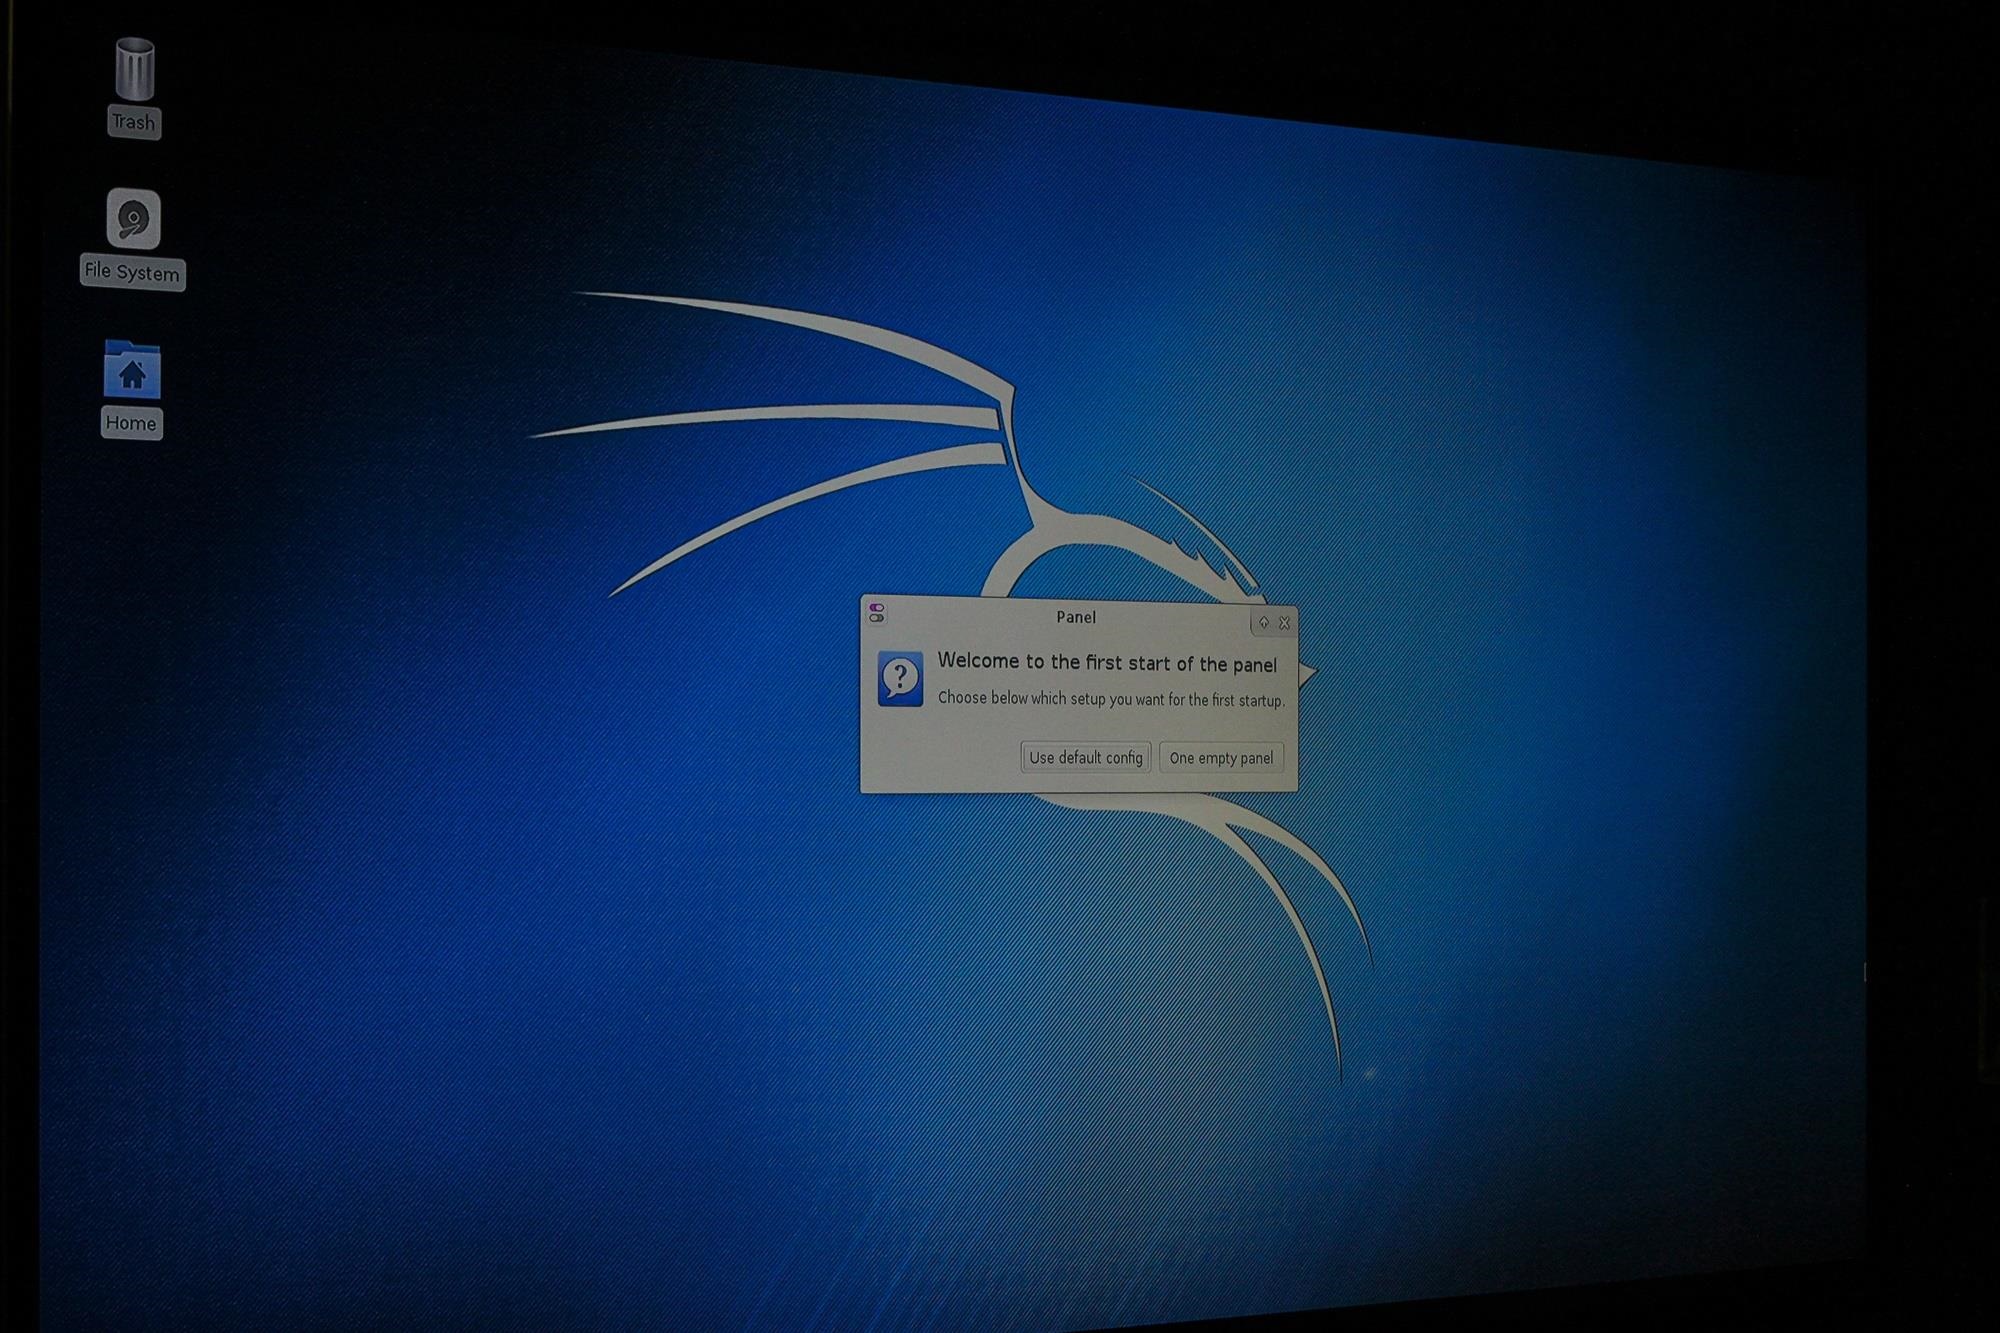
Step 3Boot into Kali Linux
When finished, your SD card is ready to go! Insert the SD card into your Pi, connect it to HDMI, and attach your Bluetooth keyboard. Plug in the power source to boot into Kali Linux for the first time. To get to the desktop, your default login is "root" with "toor" being the password.
The login process is a problem for autonomous control, and we will need to disable it later. This will let us plug our Pi in and immediately connect to it remotely without a screen.
Step 4Update Kali Linux
Kali Linux is a special flavor of Debian Linux meant for penetration testing, and a favorite here on Null Byte. It's compatible with some of the best and most advanced tools available for wireless hacking, and flexible enough to support a large number of hacking builds. It's maintained by Offensive Security, and you'll need to update it to the latest version to make sure all the tools work properly.
Before running, now is a good time to expand your installation to the size of the partition. To do so, run the following:
resize2fs /dev/mmcblk0p2
At the top right of the desktop, you'll see an option to connect to a nearby wireless network. Connect to your phone's hotspot or a friendly AP to fetch the update. Run the update by opening a terminal window and typing the following:
apt-get update
apt-get upgrade
apt-get dist-upgrade
Your Kali install is now up to date. Update the root password to something more secure than "toor" by typing:
passwd root
Then enter a new password for your Kali Linux system.
Step 5Install OpenSSH Server
To communicate with our Raspberry Pi from a computer or phone, we'll need to be able to log in. To do so, we can use SSH to connect via any Wi-Fi connection we share with the Pi. SSH, or the Secure Shell, is a network protocol that allows us to run commands remotely on a device. This means we don't need to plug in a screen to interact with our Pi.
In a terminal, run the following to install openSSH server and update the runlevels to allow SSH to start on boot:
apt-get install openssh-server
update-rc.d -f ssh remove
update-rc.d -f ssh defaults
The default keys represent a huge vulnerability since anyone can guess them. Let's change them immediately by running the following commands:
cd /etc/ssh/
mkdir insecure_old
mv ssh_host* insecure_old
dpkg-reconfigure openssh-server
This backs up the old SSH keys in another folder and generates new keys. Problem solved! Now let's make sure we can log in via root by typing:
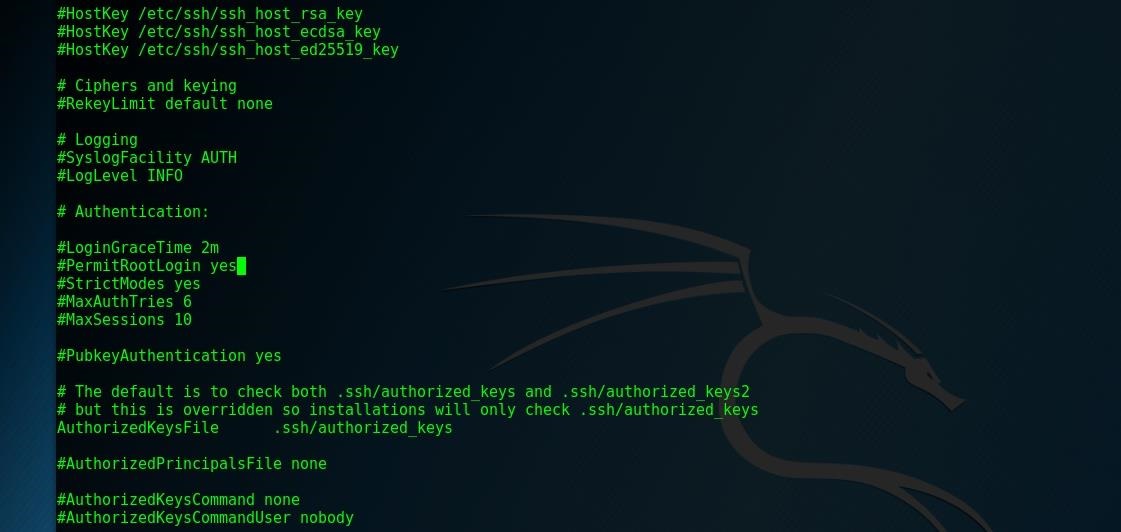
nano /etc/ssh/sshd_config
This will open your SSH configuration folder. Change this line:
PermitRootLogin without-password
To this line instead:
PermitRootLogin yes
And type Ctrl O to save the changes. If it already is correct, you don't need to change anything.
Great! Let's restart the SSH service by typing:
sudo service ssh restart
update-rc.d -f ssh enable 2 3 4 5
Finally, to test that we've got SSH working, use the following to see if SSH is currently running.
sudo service ssh status
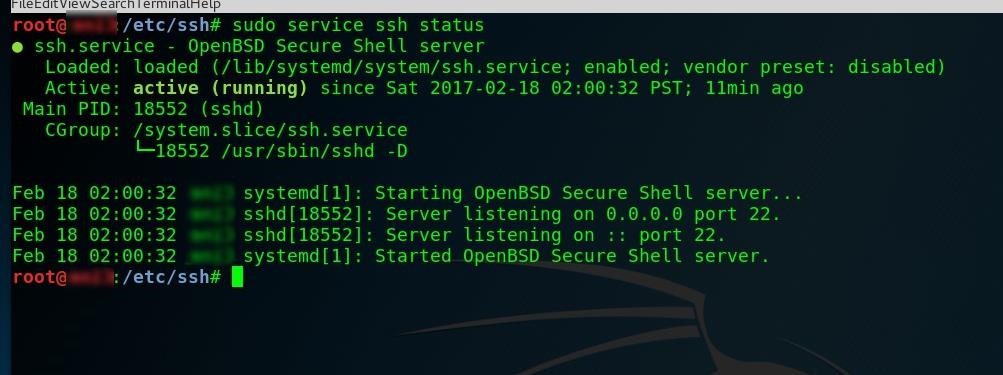
If it's not, run this to get it going:
sudo service ssh start
If you find SSH doesn't work, you can use raspi-config as a workaround. It's meant for Jessie, but it'll work on Kali, too. To use it, first clone from GitHub, type sudo mount /dev/mmcblk0p1 /boot to mount the boot partition, cd to the directory, and run sudo bash raspi-config.
Step 6Create a Custom MOTD
Of course, the speed and power of your hacking computer is directly related to how cool your message of the day (MOTD) banner is. You will be greeted with this upon successful login, and traditionally is used with some ASCII art to spice things up.
Create your own by typing:
Nano /etc/motd
Delete the contents and paste whatever you want to show up each time you log in.
Save and exit nano by hitting Ctrl O, then Ctrl X.
Step 7Test Login via SSH
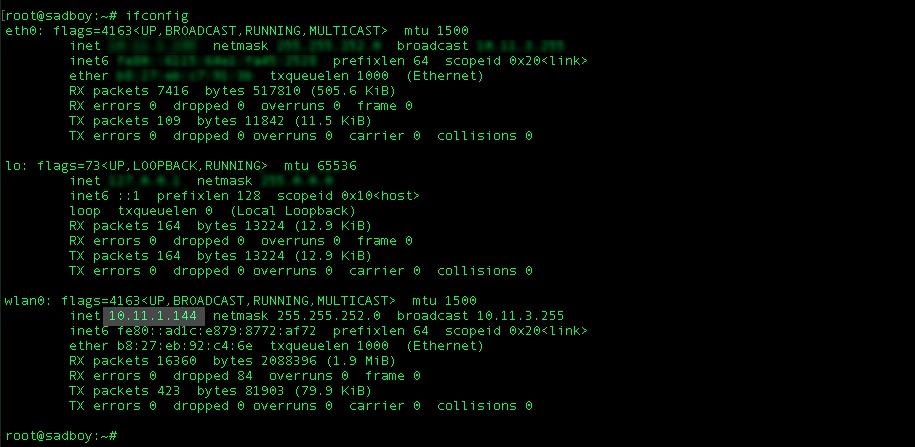
Let's try logging in from your home computer or laptop. Connect the Pi to the same wireless network your home or work computer is on. Run the command ifconfig on your Pi in terminal to learn your IP address.
ifconfig
In the comments, some people mentioned getting an error here. If so, try running
sudo apt-get install net-tools to determine if you don't have net-tools installed. Runifconfig again and see if it works. Thanks to N1GHTANG31 for pointing this out!
sudo apt-get install net-tools to determine if you don't have net-tools installed. Runifconfig again and see if it works. Thanks to N1GHTANG31 for pointing this out!
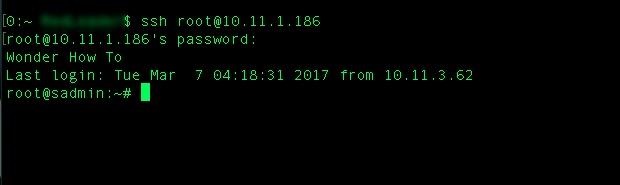
On your personal computer, type:
ssh root@(your IP address)
You should see your MOTD screen!
If not, you can run an arp-scan on a Mac to see a list of all available devices on the network if you need to find your Pi's IP address from personal computer.
Step 8Configure Autologin for Headless Operation
Sometimes, we will want to be able to log into an account other than root. Let's create a new user named WHT (or whatever you like) with root permission by running:
useradd -m WHT -G sudo -s /bin/bash
Change WHT's (or whatever you named it) password to something more secure than "toor":
passwd WHT
Great! Now let's disable that login from before so we can boot directly into Kali, and our wireless cards will start up and connect to allow us remote control. To do so, type:
nano /etc/lightdm/lightdm.conf
And delete the # before these lines:
autologin-user=root
autologin-user-timeout=0

Save and exit with Ctrl X. Next, type:
nano /etc/pam.d/lightdm-autologin
And you'll need to change this starting on line 11:
# Allow access without authentication
auth required pam_succeed_if.so user != root quiet_success
auth required pam_permit.so
To this:
# Allow access without authentication
###auth required pam_succeed_if.so user != root quiet_success
auth required pam_permit.so

Save and exit, and type "reboot" into terminal to restart your Pi to test.
Test Your Build Against This Checklist
In order to be considered field ready, your device must pass this checklist:
- The device starts up, logs on without prompting for a password, and starts SSH at boot allowing remote access.
- The device connects to the command AP to enable remote control (does this by default after connecting the first time).
- Run besside-ng script on attack antenna to test packet injection (tutorial for this).
- The Pi can be shutdown without corruption to the data on the micro SD card (boots normally after shutdown).
Pass all the requirements? Then your Raspberry Pi is ready to hit the road. I'll be writing a series of Pi-based builds, so keep up with me by building your own Raspberry Pi-based Kali Linux computer.